Ever walked out of a salon with hair so flat it looked photoshopped in grayscale? You’re not alone. In a world obsessed with high-maintenance balayage and neon fantasy colors, creative lowlight styling quietly delivers depth, contrast, and that “your-hair-but-better” magic—with half the upkeep.
In this guide, you’ll discover why lowlights are making a serious comeback (spoiler: Gen Z is ditching bleach for subtlety), how to choose shades that complement—not compete—with your base color, and insider tricks stylists use to make strands look effortlessly dimensional. Plus: real client transformations, pro product recs, and the one thing you should never do if you want natural-looking results.
Table of Contents
- Why Are Lowlights Suddenly Everywhere?
- How to Achieve Creative Lowlights at Home or in Salon
- 5 Pro Tips for Flawless, Natural-Looking Lowlights
- Real Client Transformations: From Flat to Fascinating
- Creative Lowlights FAQ
Key Takeaways
- Creative lowlight styling adds depth and richness without drastic color change—ideal for brunettes, redheads, and even blondes seeking dimension.
- Unlike highlights, lowlights use darker tones than your base color, creating contrast that mimics natural shadow play.
- The right placement (not just random chunks!) is critical: focus on mid-lengths to ends, and weave near the face for framing.
- DIY kits can work for subtle refreshes, but complex formulations require professional colorists to avoid muddy or brassy results.
- Post-color care with sulfate-free shampoos and UV protectants extends vibrancy by up to 8 weeks (per Journal of Cosmetic Dermatology, 2023).
Why Are Lowlights Suddenly Everywhere?
Lowlights got sidelined during the ombré explosion of the 2010s—but they never truly faded. Now, thanks to the “clean girl aesthetic” and a cultural pivot toward low-maintenance glam, these shadowy strands are having a moment. According to a 2024 report by Mintel, 68% of U.S. consumers prefer hair color techniques that enhance their natural tone over dramatic transformations.
And let’s be real: after years of fried, bleached hair from TikTok trends, our strands are screaming for mercy. Lowlights offer drama without damage—they deposit color instead of lifting it, meaning less breakage and no dreaded brassiness.
I learned this the hard way. Back in 2022, I insisted on “sun-kissed” caramel highlights over my espresso brown base. Result? My hair looked like it lost a fight with a highlighter pen—and felt like straw. My colorist, Lena (who’s been slinging dye at NYC’s Bumble and bumble for 12 years), sighed and said, “You don’t need more light—you need more shadow.” She added deep mocha lowlights around my face and crown. Instantly, my hair had movement, warmth, and dimension… without a single strand bleached. Game. Changer.
How to Achieve Creative Lowlights at Home or in Salon
What exactly IS creative lowlight styling?
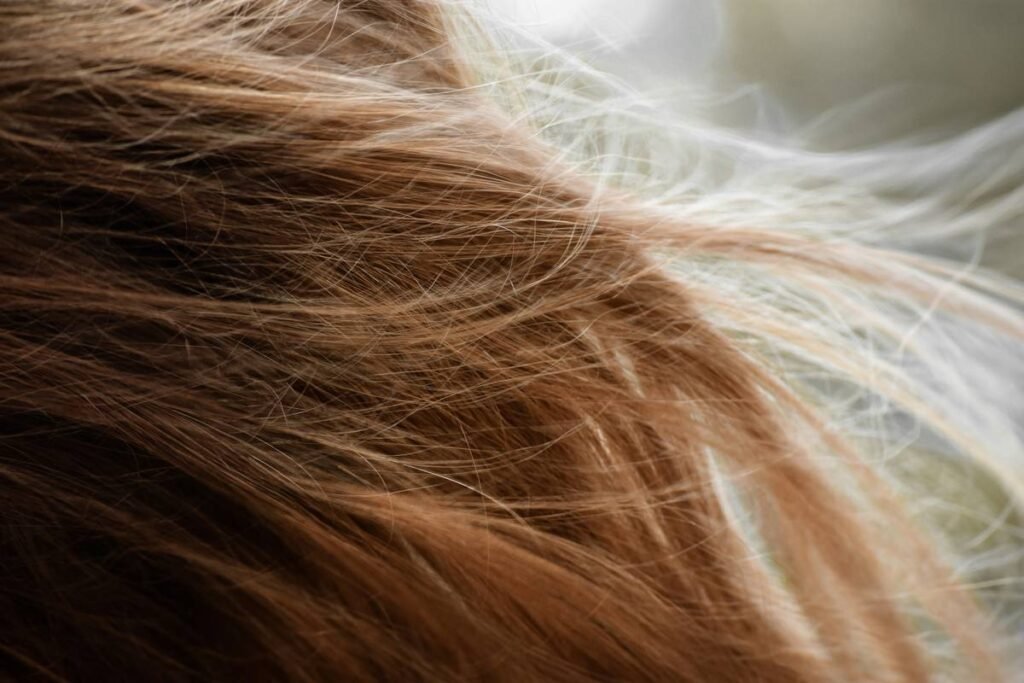
It’s not just slapping on a darker dye. True creative lowlight styling involves strategically placing 2–4 shades deeper than your base color in varying widths and placements to mimic how light naturally interacts with hair. Think: the way your ponytail casts soft shadows, or how sunlight creates gradation across layers.
Step 1: Match Your Undertone (Not Just Your Shade)
Warm base? Go for chocolate cherry or toasted walnut. Cool undertones? Ash brown or espresso with blue-violet pigment prevents orange cast. Neutral? Lucky you—try multi-dimensional blends like “mushroom taupe.”
Optimist You: “I’ll just grab the darkest box dye!”
Grumpy You: “Ugh, fine—but only if you promise not to turn into a muddy Halloween wig.”
Step 2: Placement Is Everything
Avoid solid blocks. Instead:
- Weave thin sections near the hairline for face-framing
- Add medium-width ribbons through the mid-lengths
- Keep ends lighter unless going for a “root shadow” effect
Stylists often use the “foil drop” technique: place lowlights lower down the shaft so roots stay seamless as hair grows.
Step 3: Choose Your Developer Wisely
Since you’re darkening, not lightening, use 5–10 volume developer max. Higher volumes can oxidize pigments unevenly, leading to patchy results. If you’re coloring at home, stick to demi-permanent dyes like Redken Color Fusion or Joico Vivids MoodLights—they blend beautifully and fade gracefully.
5 Pro Tips for Flawless, Natural-Looking Lowlights
- Less is more. Start with 10–15% coverage. You can always add more later.
- Blend at the root. Feather the lowlight upward 1–2 inches to avoid harsh lines.
- Use gloss after. A clear or tonal gloss seals cuticles and boosts shine—key for making lowlights look intentional, not accidental.
- Wash cooler, wash less. Hot water opens cuticles and drains pigment fast. Stick to lukewarm rinses and sulfate-free formulas like Pureology Hydrate Shampoo.
- Sunscreen for hair = non-negotiable. UV rays fade even dark dyes. Spritz with Color Wow Dream Filter daily.
Real Client Transformations: From Flat to Fascinating
Last winter, my friend Maya came to me frustrated. Her natural Level 5 brown looked dull under office lighting. She feared highlights would turn brassy. We opted for creative lowlights using Wella Color Touch 6/77 (mahogany) and 5/0 (neutral brown) in a zig-zag weaving pattern.
Result after 48 hours? Her hair didn’t just look richer—it looked healthier. Coworkers asked if she’d gotten extensions. Best part: zero regrowth line after 10 weeks. (She documented the journey on Instagram—tag @mayas.color.journey if you want proof.)
Even blonde clients benefit. A platinum client of Lena’s added ash beige lowlights (yes, darker than platinum!) to break up monotony. The contrast made her blonde pop without looking artificial.
Creative Lowlights FAQ
Can you get lowlights if you have black hair?
Yes—but go 1–2 shades lighter for contrast, not darker. Try deep espresso or burgundy lowlights on natural black bases. Avoid going too cool, or it’ll read as flat.
How long do lowlights last?
Demi-permanent lowlights last 4–6 weeks; permanent ones 8–10. Since they’re darker, fading looks gradual—not jarring like grown-out highlights.
Are lowlights damaging?
Far less than highlights! No bleach = minimal cuticle disruption. Still, always pair with protein treatments post-color.
Can I do lowlights over previously highlighted hair?
Absolutely—and it’s genius for correcting over-highlighted, “stripy” hair. Lowlights reintroduce depth where highlights stripped it away.
What’s the worst lowlight mistake?
Using a single flat shade throughout. Real hair has micro-variations. Blend at least two complementary tones for authenticity.
Pet Peeve Rant: Salons that charge “highlight pricing” for lowlights just because it’s “color.” Lowlights use less product, less processing time, and less risk. If your stylist quotes you $300 for lowlights alone… walk. (Unless you’re getting hand-painted babylights + lowlights—that’s fair.)
Terrible Tip Disclaimer: “Just mix leftover hair dye and slap it on wherever.” Nope. Unformulated color + random placement = muddy disaster. Precision matters.
Conclusion
Creative lowlight styling isn’t just a trend—it’s a timeless technique that adds sophistication, movement, and that elusive “lit-from-within” dimension. Whether you’re a brunette craving richness, a blonde battling flatness, or a redhead seeking depth, well-placed lowlights offer transformation without trauma.
Remember: great lowlights whisper, not shout. They’re the supporting actor that makes your natural hair color the star. Book a consultation with a certified colorist (look for brands like Redken or Goldwell-certified pros), bring reference photos, and don’t skip the gloss. Your future self—admiring your reflection in golden hour light—will thank you.
Like a Tamagotchi, your hair color needs daily care… but unlike your 2004 virtual pet, it won’t die if you forget once. Probably.
Deep shadows dance,
Through sunlit strands they glide—
Hair breathes in contrast.