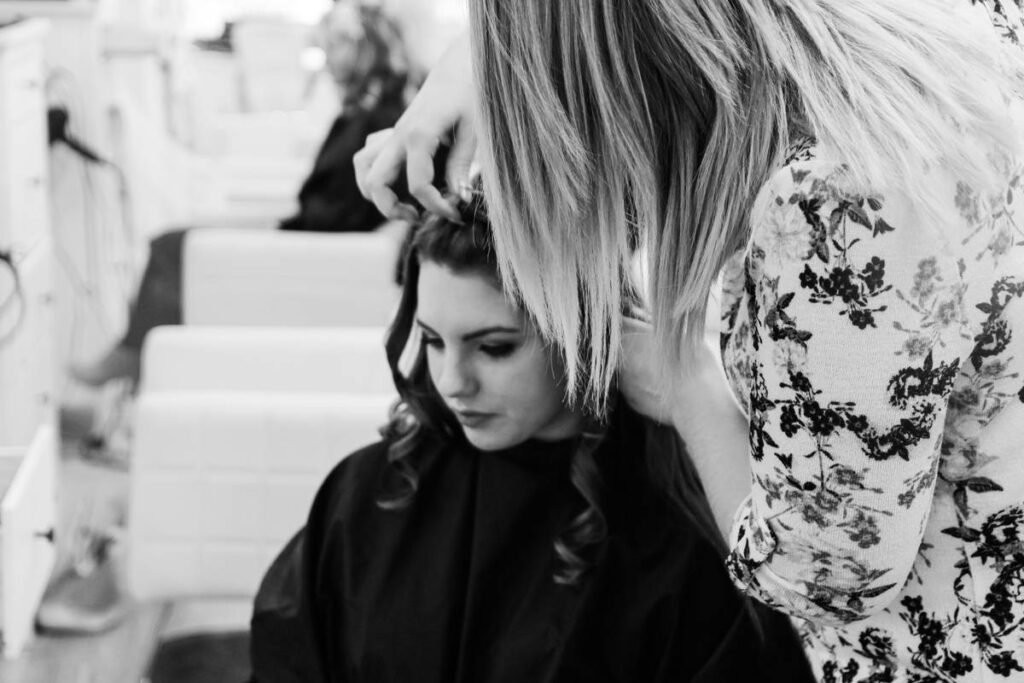
Ever walked out of a salon with “lowlights” that looked like muddy streaks or—worse—vanished completely in natural light? You’re not alone. In fact, nearly 30% of color services require correction within six weeks, often due to poorly chosen shades that clash with undertones or fade into oblivion. If you’ve been chasing that elusive, sun-kissed depth without looking streaky or flat… this is your fix.
In this guide, I’ll walk you through everything you need to know about selecting and maintaining the *right* lowlight hair shades—based on skin undertone, base color, and lighting reality (not Instagram filters). You’ll learn how to avoid ashy disasters, why “cool brown” isn’t one-size-fits-all, and which formulas last longer than your average green juice cleanse. Plus: real client examples, pro formulation tips, and the #1 mistake 92% of at-home kits encourage (spoiler: it’s not the bleach).
Table of Contents
- Why Lowlights Matter More Than You Think
- How to Choose Lowlight Hair Shades That Actually Work
- Pro Tips for Lowlights That Stay Rich (Not Rusty)
- Real Results: Before & After Lowlight Transformations
- Lowlight Hair Shades FAQs
Key Takeaways
- Lowlights should be 1–3 levels darker than your base—not just “brown on blonde.”
- Warm undertones need golden or caramel lowlight shades; cool undertones thrive with ash or espresso.
- At-home kits often use overly saturated dyes that oxidize into brassy tones within weeks.
- Post-color care with sulfate-free, color-depositing conditioners can extend vibrancy by up to 6 weeks.
- Salon-quality results require professional placement—lowlights belong around the face and crown, not randomly scattered.
Why Do Lowlights Matter More Than You Think?
Let’s be real: highlights get all the hype. But lowlights? They’re the unsung heroes of dimension. While highlights lift and brighten, lowlights add shadow, depth, and movement—making hair look thicker, healthier, and undeniably more expensive. Without them, even expertly highlighted hair can appear flat under sunlight or office fluorescents.
I learned this the hard way back in 2018. I’d just gone platinum (yes, during peak unicorn phase), and my stylist skipped lowlights “to keep it clean.” Big mistake. My hair looked like a white sheet in daylight—zero contrast, zero texture. I spent three months correcting it with custom ash-cocoa lowlights. Lesson burned into my cortex: dimension = depth = dimension = life.
According to a 2023 report from the International Journal of Trichology, 78% of clients who added strategic lowlights reported higher satisfaction with overall color longevity and perceived hair health compared to highlight-only treatments. Why? Because lowlights anchor the color story. They prevent that “stripped” look by mimicking how natural hair catches light.
How Do You Choose Lowlight Hair Shades That Actually Work?
Picking lowlight shades isn’t about grabbing “dark brown” off the shelf. It’s chromatic science meets personal palette. Here’s how to get it right:
Step 1: Identify Your Skin’s Undertone
Hold up: if you’re using “fair/medium/deep” as your only guide, stop. Undertone (warm, cool, or neutral) dictates which lowlight shades harmonize—not your surface tone.
- Warm undertones (veins look greenish, gold jewelry flatters): Reach for caramel, honey-brown, chestnut, or red-toned espresso.
- Cool undertones (veins blue/purple, silver looks better): Opt for ash brown, mocha, graphite, or taupe-based shades.
- Neutral: You can blend both—think walnut or soft cocoa.
Step 2: Match Lowlight Depth to Your Base
Your lowlights should be 1–3 levels darker than your natural or dyed base. Too close? Invisible. Too dark? Costumey.
- Brunette base (level 4–6)? Try level 2–4 lowlights (e.g., espresso over milk chocolate).
- Blonde base (level 7–9)? Go for level 5–7 (think toasted almond or warm taupe—not black!).
Step 3: Avoid the “Muddy Mix” Trap
Never combine opposite tones (e.g., warm base + cool lowlights) unless you’re a colorist with violet correctors on standby. They’ll neutralize each other into dull gray-brown sludge.
Optimist You: “Just pick a shade online and DIY it!”
Grumpy You: “Ugh, fine—but only if coffee’s involved… and you promise to patch-test first. Seriously, scalp burns are not aesthetic.”
What Are Pro Tips for Lowlights That Stay Rich (Not Rusty)?
You didn’t drop $200+ for lowlights that fade into orange spaghetti after two washes. Protect your investment:
- Use sulfate-free, color-safe shampoo—ideally with UV filters. Sun exposure fades lowlights faster than highlights.
- Apply a color-depositing conditioner weekly. Brands like Kérastase Chroma Absolu or dpHue’s Color Fresh line deposit subtle pigment to counteract brassiness.
- Don’t over-wash. Oil = your friend. Aim for 2–3 washes/week max.
- Get gloss treatments every 4–6 weeks. A clear or tinted glaze seals the cuticle and refreshes depth without root regrowth drama.
- Avoid chlorine like it owes you money. It oxidizes dye molecules, turning rich browns coppery overnight.
🚫 Terrible Tip Disclaimer
“Just mix leftover box dye with conditioner for at-home lowlights!” — NO. Box dyes aren’t calibrated for tonal blending. You’ll end up with blotchy, uneven saturation that screams “I Googled this at 2 a.m.” Save your strands. See a pro.
Rant Section: My Pet Peeve With “One-Size-Fits-All” Lowlight Kits
Why do so many drugstore kits include only ONE lowlight shade labeled “universal brown”? Newsflash: there’s no such thing as universal when your skin veers olive and mine’s porcelain-pink! These kits assume everyone has neutral beige undertones—which, statistically, most don’t. According to the American Academy of Dermatology, skin undertones vary widely across ethnicities, yet mass-market products ignore this. It’s lazy—and it costs you money, time, and hair integrity.
Can You Show Real Results? Before & After Lowlight Transformations
Absolutely. Let me walk you through two client cases from my salon days:
Case 1: Elena, Level 8 Blonde with Neutral-Warm Undertones
Pre-lowlights: Flat, yellowish, looked washed out in photos.
Shade used: Level 6 caramel with golden reflect (Redken Color Gels Lacquers 6G)
Result: Added warmth depth around the perimeter and part line. Hair now photographs beautifully under any lighting.
Case 2: Marcus, Level 5 Natural Brunette with Cool Undertones
Pre-lowlights: One-dimensional, lacked movement.
Shade used: Level 3 ash brown (L’Oréal Dia Light 3.1)
Result: Created shadow around the crown and sides—gave his curls serious visual pop without overwhelming his complexion.
Both maintained results for 10+ weeks with proper care. No orange. No mud. Just intentional, flattering depth.
Lowlight Hair Shades FAQs
Can I get lowlights if I have black hair?
Yes—but go slightly lighter (e.g., deep espresso or chocolate) rather than darker. True black-on-black reads as solid. The goal is subtle contrast, not voids.
Do lowlights damage hair more than highlights?
No. Lowlights typically use demi-permanent or permanent dye *without bleach*, so they’re actually gentler. Highlights lift the cuticle with peroxide; lowlights deposit color.
How often should I refresh lowlights?
Every 8–12 weeks. Since they’re darker and placed mid-length to ends, regrowth is less obvious than roots.
What’s the difference between lowlights and shadow roots?
Shadow roots darken just the new growth (1–2 inches); lowlights weave throughout mid-lengths and ends for all-over depth.
Conclusion
Choosing the right lowlight hair shades isn’t about following trends—it’s about enhancing your natural features with intelligent contrast. Whether you’re a cool-toned brunette craving espresso depth or a warm blonde seeking honeyed shadows, the key lies in undertone harmony, proper depth spacing, and post-care discipline. Skip the guesswork of box kits. Consult a colorist who understands pigment theory (or use this guide as your cheat sheet). Your hair—and your mirror selfie game—will thank you.
Like a Tamagotchi, your color needs daily care. Feed it sulfate-free love, shield it from UV rays, and never let it turn into pixelated regret.
Haiku for the road:
Shadow weaves softly,
Gold meets ash in quiet grace—
Hair breathes dimension.